I thought it might be fun to get a whole bunch of random art supplies and have my son craft some stuff with me. Glue, pom poms, pipe cleaners, tons of glitter, popsicle sticks... You name it! We ended up making a huge mess, and eventually he went off to play while I continued covering myself with white glue and glitter lol

It has been so many years since I made paper snowflakes, I didn't remember how to do it! (sad) This is reason #3482 that the internet is your friend... I found this great sight that teaches you how to make some cool snowflakes... Check it out!!
http://highhopes.com/snowflakes.html
My son had a little trouble with the scissors, so I started making some and let him decorate them any way he wanted. Pom poms and glitter were the tools of choice ;) He had a blast doing this!
You may also notice that my snowflakes look in no way like the nice ones on the website... I didn't really get the hang of until later, when I started practicing after my son went to bed! haha!

We had also collected some pine cones from our yard (before we had all of this snow!), in the hopes of making some glittery pinecone ornaments to give as gifts. Although our yard has about fifty pine trees in it, they only seem to be the kind that produce tiny pinecones! Turns out, they look just as pretty as the big ones with ice flake, sparkling white, and lime green glitter on them! (They are still waiting to be turned into something giftable...)

What do you like to make with your kids? Any cute ideas for holiday gifts? Please share!
Stay Crafty!
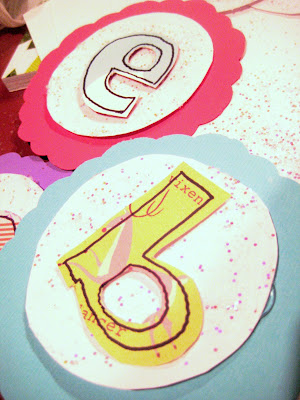
 To make this I used leftover cardstock from my paper chain project (so it would match!), white cardstock, glitter, 3-D dots, glue, ribbon, a sharpie, scallop edge scissors, and some sheets of scrapbooking paper (that I painstakingly took FOREVER picking out at the craft store, only to cut it up into little letters where you can't see the pattern anyway... HAHA yup! Go me!)
I traced circles of two different sizes, and used the shaped scissors to cut the larger circle. I covered the white paper with glue and glitter (in my "I need instant results" manner, I used a quick dry glue... Next time I would just suck it up and wait for the regular glue to dry. I wasn't quick enough with the glittering, so the paper is only half as sparkly as I hoped!!)
 The letters I drew freehand, cut them out, and traced them with a black sharpie. The "spacer" in between the words is a tree covered with glitter. I used 3-D glue dots to make the letters and the white circles pop a bit.
My living room is kind of dark, so it was tough to get a good photo.. It looks so much better in person! Make one, and you'll see ;)

 Stay Crafty! :)


